
Table of Contents
ToggleWall sconces have been fixtures in homes for centuries, evolving from candlelit iron brackets to hardwired electrical fixtures that blend form and function. Traditional wall sconces bring warmth, architectural interest, and task lighting to spaces where overhead fixtures fall short. Unlike trendy statement pieces that date quickly, traditional sconces anchor a room with classic proportions, familiar materials, and versatile finishes. Whether you’re restoring a period home or adding character to new construction, understanding how traditional sconces work, and how to install them properly, gives you lighting that feels both intentional and timeless.
Key Takeaways
- Traditional wall sconces solve three lighting challenges: they free up floor and table space, add layered lighting to reduce harsh shadows, and highlight architectural features without ceiling penetration.
- Proper installation of traditional sconces requires mounting at 60–66 inches from the floor to centerline for hallways and living spaces, with spacing of 6–8 feet apart for consistent light patterns.
- Traditional wall scones work best in hallways, bathrooms, bedrooms, dining rooms, and entryways, with style options including Colonial, Victorian, Arts and Crafts, and Federal designs that match your home’s existing trim and hardware.
- Always turn off power at the breaker and use a voltage tester before installing a sconce, and hire a licensed electrician if you need to run new wiring, move junction boxes, or are uncomfortable working with electrical circuits.
- LED bulbs with 2700K color temperature are the practical choice for traditional sconces, offering 15,000+ hours of lifespan while maintaining warm lighting that complements brass, bronze, and wrought iron finishes.
- Mount bathroom sconces 36–40 inches apart at face height (60–65 inches from the floor) to eliminate shadows for tasks like shaving and makeup application.
What Are Traditional Wall Sconces?
Traditional wall sconces are fixtures mounted directly to wall surfaces, designed to illuminate vertically or cast light upward and downward. Unlike modern minimalist sconces or industrial cage lights, traditional designs pull from historical periods, Colonial, Victorian, Arts and Crafts, and Federal styles.
They typically feature materials like brass, bronze, wrought iron, or oil-rubbed finishes, paired with glass shades (clear, frosted, or seeded), fabric shades, or exposed candelabra bulbs. The scale tends to be moderate, 8 to 14 inches in height, so they don’t overwhelm a wall but still provide noticeable presence.
Most traditional sconces are hardwired, meaning they connect to your home’s electrical system via a junction box and wall switch. Some battery-operated or plug-in versions exist, but they sacrifice the clean look and reliability of a wired fixture. If you’re installing in a location without existing wiring, plan for either running new cable through the wall (often requiring drywall patching) or hiring an electrician.
Why Choose Traditional Wall Sconces for Your Home
Traditional sconces solve three common lighting challenges: they free up floor and table space, they add layers to a room’s lighting scheme, and they highlight architectural features without requiring ceiling penetration.
Space efficiency matters in hallways, powder rooms, and tight bedrooms where table lamps eat into usable surfaces. Sconces mounted at eye level (typically 60 to 66 inches from the finished floor to the fixture’s center) provide task lighting for mirrors, reading nooks, or artwork without crowding furniture.
Layered lighting combines ambient (overhead), task (sconces, under-cabinet), and accent (picture lights, uplights) sources. Sconces fill the middle zone, reducing harsh shadows from recessed cans and adding visual interest at human scale. In dining rooms and living rooms, pairing sconces with dimmers creates flexibility for different activities.
Architectural definition comes from the fixtures themselves. A pair of brass sconces flanking a fireplace mantel or a single sconce beside a doorway draws the eye and reinforces symmetry. In older homes, sconces feel native to the architecture, especially if you match the finish to existing hardware like door knobs and cabinet pulls.
Popular Styles of Traditional Wall Sconces
Colonial and Early American sconces mimic candleholders, often with curved arms, simple backplates, and candelabra-base bulbs. Finishes lean toward antique brass, pewter, or black iron. These work well in foyers, dining rooms, and staircases in homes with traditional trim and paneling.
Victorian and Gothic Revival designs add ornament: frosted glass shades, etched patterns, and heavier castings. Expect more decorative backplates and sometimes dual arms for two bulbs. These pair with homes that have detailed millwork, wainscoting, or vintage tile.
Arts and Crafts (Craftsman) sconces emphasize handcrafted materials, hammered copper, mica shades, geometric glass panels, and clean lines without excessive flourish. They suit bungalows, Prairie-style homes, and spaces where natural wood and exposed beams dominate.
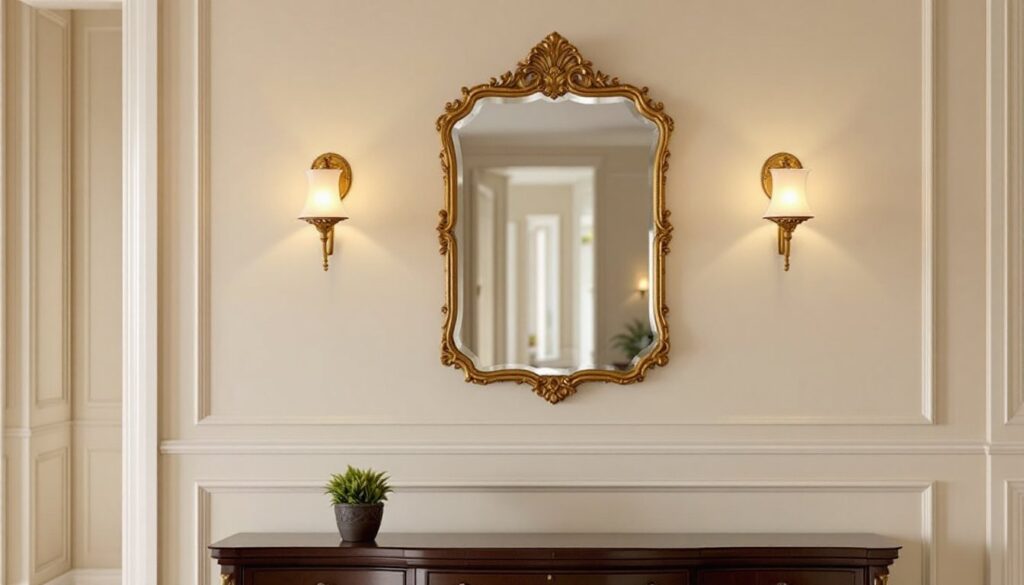
Federal and Neoclassical styles incorporate polished brass, crystal accents, and urn shapes. These are more formal and work in entryways, powder rooms, or dining rooms where you want a bit of elegance without going full chandelier.
When choosing a style, match it to your home’s existing trim, hardware, and proportions. A heavy Gothic sconce looks out of place in a ranch with low ceilings: a delicate Federal sconce disappears in a rustic farmhouse.
Best Rooms and Placements for Traditional Wall Sconces
Hallways and staircases benefit from sconces spaced 6 to 8 feet apart along the wall. Mount them at consistent height, 60 to 66 inches to centerline, so the light pattern stays even. If your hallway is narrow (less than 42 inches wide), avoid sconces that project more than 6 inches from the wall to prevent head bumps.
Bathrooms use sconces flanking mirrors for even, shadow-free task lighting. Position them 36 to 40 inches apart (center to center) and at face height, roughly 60 to 65 inches from the floor. This setup eliminates the harsh overhead shadows that make shaving or applying makeup difficult. Check your local codes: bathrooms have wet and damp location ratings and GFCI requirements near sinks and tubs.
Living rooms and bedrooms use sconces for reading or accent lighting. Flank a sofa or headboard with sconces at 48 to 60 inches to centerline, higher than hallway sconces to direct light downward over a shoulder. Swing-arm sconces let you adjust the light position without moving the fixture, handy for bedside reading without disturbing a partner.
Dining rooms traditionally mount sconces on the wall opposite windows or flanking a buffet. Keep them at standard 60 to 66-inch height and use dimmers to adjust for meals versus tasks. Experts at This Old House recommend pairing sconces with a central chandelier for balanced ambient and accent light.
Entryways and foyers use a single sconce beside a door or mirror, or a symmetrical pair on either side of a console table. If your ceiling is tall (over 9 feet), you can go slightly higher, up to 72 inches, to keep proportions balanced.
How to Install Traditional Wall Sconces (DIY Guide)
Check codes and permits. Most jurisdictions allow homeowners to install light fixtures on existing circuits, but any new wiring or circuits requires a permit and often a licensed electrician. If you’re adding a sconce where no junction box exists, you’ll need to fish cable through the wall, a bigger job that may involve cutting drywall and patching.
Gather tools and materials:
- Voltage tester (non-contact or two-lead)
- Screwdriver set (flathead and Phillips)
- Wire stripper
- Wire nuts (usually included with fixture)
- Drill with bits (if mounting to drywall or masonry)
- Stud finder (if no existing box)
- Ladder or step stool
- Safety glasses and work gloves
Step-by-step installation:
-
Turn off power at the breaker. Flip the wall switch to confirm it’s dead, then use a voltage tester on the wires in the junction box. Never trust the switch alone.
-
Remove the old fixture (if replacing). Unscrew the mounting plate, disconnect wire nuts, and set the old sconce aside. If installing fresh, verify your junction box is securely fastened to a stud or has a metal old-work box with wings that grip the drywall.
-
Attach the mounting bracket to the junction box using the screws provided with your new sconce. Most traditional sconces use a crossbar that spans the box’s threaded holes.
-
Connect wires. Match black (hot) to black, white (neutral) to white, and bare copper or green (ground) to the fixture’s ground wire or grounding screw. Twist connections clockwise, secure with wire nuts, and tuck neatly into the box. Leave enough slack so wires aren’t strained.
-
Mount the sconce to the bracket. Most traditional sconces use a center nipple and finial or side screws. Align the fixture, hand-tighten, then snug with a screwdriver, don’t overtighten or you’ll crack the backplate.
-
Install the shade or glass. Some sconces use a threaded ring, others have clips or set screws. Handle glass carefully: seeded or frosted glass can chip.
-
Restore power and test. Flip the breaker, turn on the switch, and check that the bulb lights. If it doesn’t, turn off power and recheck wire connections.
When to call a pro: If you’re uncomfortable working with live circuits, if your box is loose or missing, or if you need to run new wiring through walls or across studs, hire a licensed electrician. The NEC (National Electrical Code) has specific rules for box fill, wire gauge, and circuit loading, violations can cause fires or failed inspections.
Choosing the Right Bulbs and Finishes
Bulb type and base: Traditional sconces most often use candelabra (E12) or medium (E26) bases. Check your fixture’s maximum wattage, often 60W for incandescent or equivalent lumens for LED. LEDs are the practical choice: they last 15,000+ hours, run cool, and draw a fraction of the power.
Color temperature affects mood. 2700K (soft white) mimics incandescent warmth and suits living areas, bedrooms, and dining rooms. 3000K (warm white) is slightly crisper, good for hallways and task lighting. Avoid cool white (4000K+) in traditional fixtures, it clashes with warm metal finishes and feels institutional.
Bulb shape matters for exposed-bulb sconces. Torpedo (B10 or B11) and globe (G16.5) LED bulbs mimic vintage candle flames without the flicker or fire risk. Filament-style LEDs add nostalgic detail if your sconce has clear glass.
Dimmer compatibility: Not all LEDs dim smoothly. Look for bulbs labeled dimmable and pair them with an LED-compatible dimmer (not an old incandescent rotary). Flickering or buzzing means a mismatch, swap the dimmer or the bulbs.
Finish durability: Brass and bronze develop patina over time, which many homeowners want. If you prefer consistent shine, choose lacquered brass or polished nickel. Oil-rubbed bronze hides fingerprints and water spots well, making it a go-to for bathrooms. Match your sconce finish to door hardware, faucets, and cabinet pulls for a cohesive look.
According to lighting designers at Country Living, getting the balance between ambient and task lighting right in every room often means layering sources like sconces with overhead fixtures. Experts at Southern Living often highlight how traditional sconces enhance classic Southern interiors by adding warmth and architectural detail without sacrificing floor space.
Conclusion
Traditional wall sconces deliver reliable, space-efficient lighting with timeless design that anchors a room rather than dating it. Choosing the right style, placing fixtures at the proper height, and installing them safely ensures they’ll serve your home for decades. Whether you’re flanking a bathroom mirror, lighting a staircase, or adding warmth to a living room, sconces turn functional lighting into architectural detail.