Table of Contents
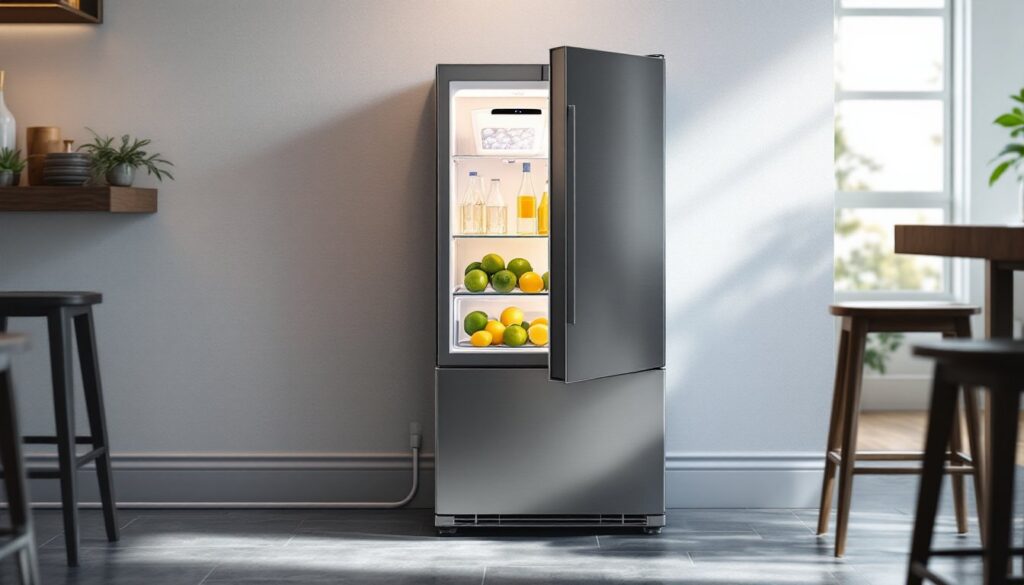
ToggleA compact fridge with an ice maker solves a surprisingly common problem: limited space with full-function expectations. Whether you’re outfitting a basement kitchenette, home office, or garage workshop, having cold storage and ice production in one small footprint eliminates the need for separate units. But not all small refrigerators are created equal, and adding an ice maker introduces plumbing, power, and maintenance considerations that basic compact models skip. This guide walks through what to look for, where to install them, and how to keep them running efficiently.
Key Takeaways
- A small refrigerator with ice maker combines cold storage and ice production in one compact unit, eliminating the need for separate appliances in basements, home offices, and garages while costing $500–$1,200 upfront.
- Prioritize features like automatic defrost, reversible doors, adjustable shelving, and temperature stability (32–38°F fridge, 0–5°F freezer) when selecting a compact model for your space.
- Ice production capacity ranges from 12 to 35 pounds per day, with storage holding 1–3 pounds at a time—choose based on whether you need it for occasional use or regular entertaining.
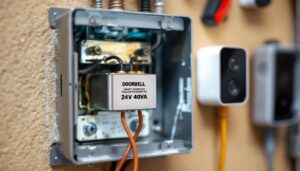
- Water line installation requires tapping into existing cold water lines, running a dedicated line, or using manual-fill reservoirs; always include an accessible shut-off valve for maintenance and winterization.
- Proper maintenance—cleaning the ice bin every 3–6 months, replacing water filters, and checking for kinks in water lines—prevents most ice maker failures and keeps your unit running efficiently.
- Compact models with ice makers consume 200–400 kWh annually, costing $25–$70 per year to operate, making ENERGY STAR certification valuable for long-term savings over the 10-year lifespan.
Why Choose a Compact Refrigerator with Built-In Ice Maker?
Standard compact refrigerators top out around 4.5 cubic feet and often include a small freezer compartment, but most lack ice production. Adding an ice maker changes the utility completely.
In a home office or guest suite, a small ice-making fridge means visitors or remote workers don’t need to trek to the main kitchen. For finished basements with wet bars or media rooms, it consolidates two appliances into one. Garages and workshops benefit too: cold drinks on hand without sacrificing workspace for a full-size unit.
The trade-off is simple. These units cost more upfront (typically $500–$1,200 versus $150–$400 for non-ice models), require a dedicated water line, and need periodic maintenance. If space is tight and ice is non-negotiable, that trade-off makes sense. If ice is a nice-to-have, a standard compact fridge paired with silicone ice trays may be more practical.
Most models with ice makers fall into the 3.1 to 4.5 cubic foot range. Anything smaller often lacks the internal volume for both adequate refrigeration and ice-making components.
Key Features to Look For in a Small Ice-Making Fridge
Not all compact ice-making refrigerators deliver the same performance. Prioritize these features based on how you’ll actually use the unit.
Automatic vs. manual defrost matters more than most buyers realize. Manual defrost units cost less and run quieter, but they require unplugging and draining every few months to prevent ice buildup in the freezer compartment. Automatic defrost cycles handle this for you but add $100–$200 to the price and increase energy consumption slightly.
Reversible door swing is essential if you’re installing in tight quarters. Most models allow you to flip the hinge side, but confirm before purchasing, not all do.
Adjustable shelving and door bins give flexibility. Fixed wire shelves limit what you can store. Look for at least one adjustable shelf and a crisper drawer if you’re storing produce.
Built-in or freestanding design affects installation. Freestanding units need clearance on all sides for ventilation (typically 1–2 inches on sides and back, 2–3 inches on top). Built-in models have front ventilation and can tuck under counters, but they cost significantly more.
Temperature range should reach at least 32–38°F in the fridge and 0–5°F in the freezer. Cheaper units struggle to maintain these ranges consistently, especially in unconditioned spaces like garages.
Small spaces call for creative solutions, and compact appliances like these fit well in apartment-sized layouts where every square foot counts.
Ice Production Capacity and Storage
Ice production rates for compact models range from 12 to 35 pounds per day. A 12-pound-per-day unit produces roughly one standard ice bin’s worth daily, adequate for a couple or small gatherings. If you’re hosting regularly or running a home bar, aim for 25+ pounds per day.
Storage capacity is separate from production. Most small ice makers hold 1–3 pounds of ice at a time. Once the bin fills, production pauses until you remove ice. If you need more storage, consider a model with a larger bin or plan to transfer ice to a separate freezer.
Cube size and type vary. Some units produce crescent-shaped cubes, others make smaller nugget or bullet ice. Crescent cubes melt slower and work better for cocktails. Bullet ice is softer and works well for blended drinks. Check the specs, this isn’t always listed clearly.
Harvest cycle time (how long it takes to make a batch of ice) ranges from 15 to 30 minutes. Faster cycles mean quicker recovery after emptying the bin, but they don’t necessarily increase daily output.
Best Locations and Uses for Small Refrigerators with Ice Makers
Placement determines both performance and compliance. These units work best in climate-controlled spaces between 55–90°F. Outside that range, compressor efficiency drops and ice production slows or stops.
Basement wet bars and entertainment areas are the most common install. Pair the fridge with a small sink and you’ve got a functional beverage station. Just confirm the floor is level, unlevel installations cause door seal issues and inefficient cooling.
Home offices and guest suites benefit from self-contained refreshment setups. If the room already has plumbing (like an attached bath), running a water line is straightforward. Without nearby plumbing, you’ll need to either run a line through walls or opt for a model with a manual-fill reservoir (less common but available).
Garages work if they’re insulated and temperature-stable. Uninsulated garages in hot or freezing climates will shorten compressor life and void most warranties. Check the manufacturer’s operating range before installing in a garage.
Outdoor kitchens require a unit specifically rated for outdoor use. Standard compact fridges aren’t weatherproofed and will rust or fail when exposed to humidity and temperature swings. Outdoor-rated models cost significantly more but include stainless exteriors and sealed components.
Kitchenettes in ADUs or mother-in-law suites make excellent candidates, especially if the unit is the primary fridge. In this case, prioritize larger capacity (4+ cubic feet) and higher ice production.
Many compact kitchen designs incorporate smaller appliances to maximize counter and storage space without sacrificing functionality.
Installation Tips and Water Line Considerations
Installing a small ice-making fridge is more involved than plugging in a standard compact unit. You’ll need electrical, plumbing, and proper ventilation.
Electrical requirements are straightforward: most units run on a standard 120V, 15-amp circuit. Use a dedicated circuit if possible, sharing with high-draw appliances like microwaves or space heaters can trip breakers. Avoid extension cords. If the outlet isn’t within 3–4 feet, hire an electrician to add one.
Water line installation is the bigger challenge. You have three options:
-
Tap into an existing cold water line (sink, dishwasher, or washing machine). This is the cleanest approach. Use a saddle valve or tee fitting with a ¼-inch copper or braided stainless steel line. Saddle valves are easier to install but prone to leaks over time, consider a compression tee fitting for a more durable connection.
-
Run a dedicated line from the main supply. This requires cutting into drywall and may need a plumber if you’re not comfortable soldering copper or working with PEX. Budget $150–$400 for professional installation.
-
Manual-fill reservoir models eliminate plumbing but require refilling every few days. These are rare in compact fridges and not ideal for high-use scenarios.
Shut-off valve placement matters. Install an accessible valve close to the fridge so you can isolate the water supply for maintenance or winterization without shutting off the whole house.
Drain line isn’t required for most models, but automatic defrost units produce condensation that drains into a pan beneath the compressor. Ensure the unit is level so water doesn’t pool or leak.
Leveling the fridge is critical. Use a bubble level on top and adjust the front legs until perfectly level side-to-side and front-to-back. An unlevel fridge causes door seal gaps, inefficient cooling, and ice maker jams.
Clearance requirements depend on the model. Freestanding units need 1–2 inches on sides and back for airflow. Built-in models vent from the front and can sit flush, but confirm the specs, some “built-in ready” models still need rear clearance.
Maintenance and Troubleshooting Your Ice Maker
Ice makers fail more often than refrigeration components. Regular maintenance prevents most issues.
Clean the ice bin and maker every 3–6 months. Remove the bin, wash with warm soapy water, and wipe down the ice chute and maker assembly with a damp cloth. Mineral buildup from hard water clogs the fill tube and reduces production. If you have hard water, run a descaling solution (white vinegar works) through the water line annually.
Replace the water filter (if equipped) every 6 months or per manufacturer specs. Clogged filters reduce water flow, slow ice production, and affect taste. Most filters are twist-and-lock or push-fit, no tools required.
Check the water line for kinks or freezing. If the line runs through an uninsulated wall or cold basement, wrap it with foam pipe insulation. A kinked or frozen line stops ice production entirely.
Inspect the shut-off arm or sensor. Most ice makers stop producing when the bin is full using a mechanical arm or optical sensor. If ice production stops prematurely, the arm may be stuck or the sensor obstructed. Gently move the arm to reset it.
Troubleshoot low or no ice production by checking water pressure. Ice makers need at least 20 psi at the fridge connection. Low pressure results in small or hollow cubes. If your home has low pressure, consider a booster pump (typically a plumber’s job).
Unusual noises during ice harvest (clicking, humming, or grinding) are usually normal. A loud buzzing or continuous hum indicates a problem, often a jammed ejector or failing motor. Unplug the unit, remove the ice bin, and check for obstructions.
Frost buildup in the freezer or around the ice maker signals a door seal issue or defrost system failure. Test the door seal by closing a dollar bill in the door, if it pulls out easily, the gasket needs replacement.
Energy Efficiency and Operating Costs
Compact refrigerators with ice makers consume more energy than non-ice models, expect 200–400 kWh per year depending on size and features. For comparison, a standard full-size fridge uses 400–600 kWh annually.
ENERGY STAR certification matters. Certified models use at least 10% less energy than federal minimums. Over a 10-year lifespan, that saves $50–$100 in electricity costs. Look for the ENERGY STAR label on the specs sheet.
Operating cost averages $25–$50 per year in electricity at $0.13 per kWh (the U.S. average). If you’re in a high-cost region (like California or New England), bump that to $40–$70. Ice production adds roughly 10–15% to total consumption.
Usage patterns affect costs. A unit running in a hot garage or constantly opened door uses more energy. Models in climate-controlled spaces with infrequent door openings hit the lower end of the range.
Defrost type impacts efficiency. Manual defrost models use less energy but require periodic downtime. Automatic defrost adds convenience but increases annual consumption by 20–30 kWh.
Insulation quality varies widely. Cheaper models use thinner foam insulation, forcing the compressor to run longer. Higher-end units with better insulation maintain temperature with shorter compressor cycles, reducing wear and energy use.
Inverter compressors (variable-speed) are more efficient than traditional on/off compressors but rare in compact models. If available, they’re worth the upcharge for quieter operation and lower energy consumption.
Reviews from trusted sources, such as those covering compact refrigerator options, often highlight real-world energy performance and efficiency alongside other key features.
If you’re installing in a space with limited electrical capacity, calculate the annual kWh from the EnergyGuide label and confirm your circuit can handle the load alongside other devices.