Table of Contents
ToggleMold in the shower isn’t just unsightly, it’s a health concern and a sign that moisture control has failed. Those black or pink-tinged spots creeping along grout lines and silicone caulk won’t disappear on their own, and ignoring them only makes removal harder. The good news? Most shower mold can be eliminated with the right cleaner and a bit of elbow grease, no professional required. This guide covers the most effective commercial mold cleaners, proven DIY solutions, and the exact steps to scrub mold out of tile, grout, and shower enclosures, plus how to keep it from coming back.
Key Takeaways
- Shower mold thrives in damp, poorly ventilated spaces with soap scum and organic residue, commonly appearing as black, green, or gray patches in grout lines and silicone caulk.
- A shower mold cleaner’s effectiveness depends on its active ingredient: sodium hypochlorite works best on non-porous tile, hydrogen peroxide penetrates porous grout better, and natural options like vinegar kill about 82% of mold species.
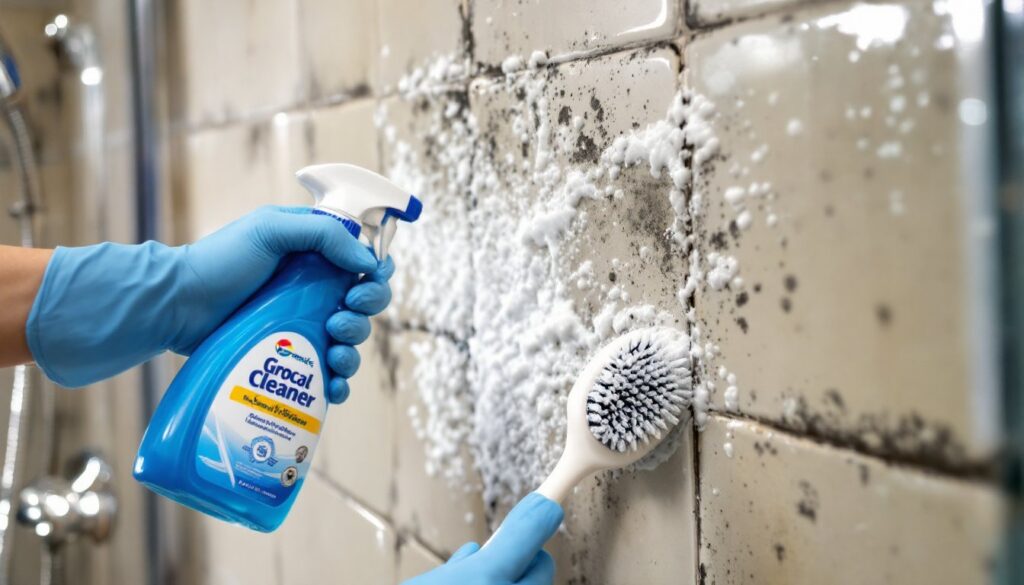
- The proper cleaning process requires safety gear, adequate ventilation, applying cleaner generously with sufficient dwell time, vigorous scrubbing of grout lines, and thorough rinsing and drying to eliminate mold spores at the root.
- Ventilation is the single most critical prevention strategy—run exhaust fans for 20-30 minutes after each shower, squeegee surfaces, and seal grout every 6-12 months to keep mold from returning.
- Professional mold remediation is recommended for coverage exceeding 10 square feet, mold behind tile or drywall, health vulnerabilities, or recurring mold indicating hidden moisture sources.
Understanding Shower Mold: Why It Grows and Where to Find It
Mold thrives in damp, poorly ventilated spaces with organic material to feed on, showers check all three boxes. Soap scum, body oils, and shampoo residue provide nutrients, while constant moisture and warm temperatures create ideal growing conditions.
The most common culprits are Cladosporium, Penicillium, and Aspergillus species, which appear as black, green, or gray patches. That pinkish-orange film is usually Serratia marcescens, a bacteria often mistaken for mold but requiring similar removal methods.
Look for growth in grout lines, especially along the shower floor and lower wall joints where water pools. Silicone caulk around tub edges and fixtures is another hotspot, mold burrows into the porous surface. Check tile corners, behind shampoo bottles, and any cracks or gaps in grout or caulk. If the shower has a door track or frame, water trapped in channels creates hidden breeding grounds.
Top Commercial Shower Mold Cleaners That Actually Work
Bleach-based cleaners remain the gold standard for killing mold on non-porous surfaces like ceramic tile and fiberglass. Products like Clorox Plus Tilex Mold & Mildew Remover deliver sodium hypochlorite in a spray form that clings to vertical surfaces. They kill mold spores on contact and lighten stains, but require adequate ventilation and can’t penetrate porous grout deeply enough to stop regrowth.
For grout and porous tile, hydrogen peroxide cleaners (3-10% concentration) work better. They penetrate deeper without the harsh fumes of bleach. Look for products labeled for mold remediation rather than general bathroom cleaners.
Concrobium Mold Control uses a different mechanism, it crushes mold spores as it dries, leaving a protective barrier. It’s non-toxic and doesn’t require rinsing, making it a solid choice for households avoiding harsh chemicals. But, it works best as a preventative after initial deep cleaning.
RMR-86 and RMR-141 are contractor-grade options. RMR-86 is a fast-acting stain remover (bleach-based), while RMR-141 is an EPA-registered fungicide that kills mold roots. Both are stronger than retail products and come in concentrate or ready-to-use formulas.
Avoid generic “mildew stain removers” that only mask discoloration without killing spores. Check the label for active ingredients, sodium hypochlorite, hydrogen peroxide, or quaternary ammonium compounds indicate true mold-killing power.
DIY Natural Mold Removal Solutions for Your Shower
White vinegar (5% acetic acid) kills roughly 82% of mold species and works on tile, glass, and some grout. Spray undiluted vinegar directly on moldy areas, let it sit for at least one hour, then scrub with a stiff brush. It won’t bleach stains as effectively as chlorine, but it’s safer for natural stone and colored grout.
Baking soda paste adds abrasive power. Mix 1/4 cup baking soda with enough water to form a spreadable paste, apply to grout lines, and scrub with a grout brush or old toothbrush. For tougher mold, combine baking soda with vinegar, the fizzing action helps lift grime, though the chemical reaction reduces vinegar’s acidity.
Hydrogen peroxide from the medicine cabinet (3% concentration) is a gentle bleaching agent safe for most surfaces. Spray it on, wait 10 minutes, scrub, and rinse. For stubborn mold, combine equal parts hydrogen peroxide and vinegar in separate spray bottles, spray peroxide first, then vinegar without rinsing in between. This cleaning method amplifies antimicrobial action.
Tea tree oil offers antifungal properties. Mix 1 teaspoon tea tree oil with 1 cup water in a spray bottle, apply, and leave it, no rinsing needed. The smell dissipates as it dries. It’s expensive compared to vinegar but useful for ongoing prevention.
Do not mix vinegar with bleach or ammonia-based cleaners. The combination produces toxic chlorine gas.
Step-by-Step Guide to Cleaning Mold from Your Shower
Safety first: Wear nitrile gloves, safety goggles, and an N95 respirator if using bleach or commercial cleaners. Open the bathroom window and run the exhaust fan. If neither exists, prop the door and use a box fan to push air out.
- Remove loose items from the shower. Take down curtains, caddies, and soap dishes.
- Pre-rinse surfaces with hot water to open grout pores and soften soap scum.
- Apply cleaner generously to all moldy areas. For grout, use a spray bottle or foam applicator to saturate lines. Don’t skimp, mold roots go deeper than the surface stain.
- Wait. Follow product dwell time (usually 5-15 minutes for commercial cleaners, up to 1 hour for vinegar). This is when the active ingredients do the work.
- Scrub grout lines with a stiff nylon grout brush. An old toothbrush works for tight corners. Use circular motions and apply firm pressure, you’re trying to dislodge spores embedded in porous surfaces.
- Rinse thoroughly with hot water. Use a handheld showerhead or bucket to flush away cleaner and loosened mold.
- Dry completely. Wipe down walls with a squeegee or microfiber cloth. Run the exhaust fan for at least 30 minutes after cleaning.
For stubborn grout stains, a second treatment may be necessary. If mold returns quickly after cleaning, the grout is likely compromised and may need sealing or replacement.
If silicone caulk shows mold penetration (black spots that won’t scrub away), surface cleaning won’t fix it. Cut out the affected caulk with a utility knife, clean the joint with rubbing alcohol, let it dry completely, and re-caulk with 100% silicone caulk rated for wet areas. GE Supreme Silicone or Loctite Polyseamseal are solid choices for mold resistance.
How to Prevent Mold from Coming Back
Ventilation is the single most important factor. Run the exhaust fan during and for 20-30 minutes after every shower. If the fan is weak (common in older homes), upgrade to a model rated for your bathroom’s cubic footage. Calculate CFM (cubic feet per minute) by multiplying room length × width × height, then dividing by 7.5. For example, an 8×5×8 bathroom needs about 43 CFM minimum.
If there’s no exhaust fan, install one. Most codes now require mechanical ventilation in bathrooms without windows. Consult local building codes, some jurisdictions mandate specific CFM ratings.
Squeegee walls and doors after each use. This simple habit removes 75% of moisture before it evaporates into the air. Keep a squeegee hanging in the shower as a visual reminder.
Seal grout lines with a penetrating grout sealer every 6-12 months. Products like Aqua Mix Sealer’s Choice Gold or Miracle Sealants 511 Impregnator create a barrier that repels water and prevents mold from taking hold. Apply sealer only to fully dry, clean grout, trapped moisture under the seal creates worse problems.
Fix leaks immediately. A dripping showerhead or loose valve lets water seep behind tile, creating mold colonies you can’t see. Tighten connections, replace worn washers, or re-caulk fixtures as needed.
Improve airflow by leaving the shower door or curtain open after use. Bunched-up curtains trap moisture. Consider upgrading to a quick-dry curtain or installing a curved rod that keeps fabric away from the tub.
For households prone to humidity issues, a small bathroom dehumidifier or whole-home HVAC humidity control keeps levels below 50%, the threshold where mold growth slows. Many resources on home maintenance strategies emphasize humidity control as a preventative measure.
When to Call a Professional for Mold Remediation
If mold covers more than 10 square feet (roughly a 3×3 area), the EPA recommends professional remediation. Large colonies indicate a moisture problem beyond surface condensation, leaking pipes, failed waterproofing, or structural damage.
Call a pro if mold appears behind tile or drywall. Soft spots, bulging grout, or visible water damage mean moisture has penetrated the wall assembly. This requires removing tile, drying the substrate, and potentially replacing water-damaged drywall or cement board. Homeowners can handle some tile removal, but assessing structural damage and ensuring proper waterproofing before re-tiling is best left to experienced contractors.
Health concerns warrant professional help. If anyone in the household has asthma, allergies, or immune system issues, exposure to mold spores during aggressive cleaning poses risks. Certified mold remediators use containment, HEPA filtration, and PPE to minimize exposure.
If mold returns within weeks of thorough cleaning, there’s a hidden moisture source. A plumber or home inspector with moisture meters and thermal imaging can locate leaks inside walls or under shower pans that aren’t visible.
Look for IICRC-certified (Institute of Inspection, Cleaning and Restoration Certification) mold remediation specialists. Ask for documentation of moisture readings, containment procedures, and post-remediation clearance testing. Avoid contractors who quote over the phone without inspecting, every mold job is different. For persistent issues and detailed approaches to tackle them, many homeowners turn to trusted home improvement resources for guidance on when DIY ends and professional help begins.
Conclusion
Most shower mold responds to consistent cleaning, the right products, and improved ventilation. Whether using commercial cleaners or DIY solutions, the key is killing spores at the root and eliminating the moisture that feeds them. Address compromised caulk and grout before mold penetrates deeper, and don’t hesitate to call in professionals when the problem extends beyond surface growth. A clean, mold-free shower isn’t just about aesthetics, it’s about maintaining a healthier home.