Table of Contents
ToggleCable railing has become one of the most popular choices for homeowners who want a clean, modern look without blocking sight lines. Whether it’s a waterfront deck or a second-story balcony overlooking a backyard, deck railing with cables offers strength, durability, and an open feel that traditional wood balusters can’t match. Unlike picket-style railings, cable systems use horizontal stainless steel or coated wires tensioned between posts, creating a barrier that meets code while staying nearly invisible. This guide walks through everything needed to choose, plan, and install cable railing, from system types to tensioning techniques and common installation pitfalls.
Key Takeaways
- Cable railing for deck systems preserve sight lines and require minimal maintenance compared to traditional wood balusters, with proper stainless steel cable resisting rust and rot for 20+ years.
- Posts must be adequately sized and reinforced—undersized or under-braced posts are the leading failure point, requiring 4×4 spacing at 3–4 feet or larger posts with diagonal bracing at corners.
- Proper hole alignment and cable tensioning are critical; cables should deflect no more than ½ inch under finger pressure, and spacing must meet the 3-inch vertical maximum to pass the 4-inch sphere code test.
- Cable railing installation requires careful planning with correct tools (cable cutters, drill guide, tension devices), local permit verification, and safety precautions due to sharp stainless steel strands.
- Routine maintenance includes semi-annual tension checks, quarterly cleaning with soapy water, annual inspection of post bases and fittings, and immediate attention to loose bolts or corrosion to ensure structural integrity.
- Through-post and surface-mount cable railing systems each suit different projects—through-post creates a sleeker look but requires precise drilling, while surface-mount is easier for retrofits on existing posts.
What Is Cable Railing and Why Choose It for Your Deck?
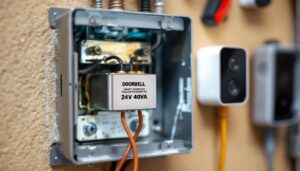
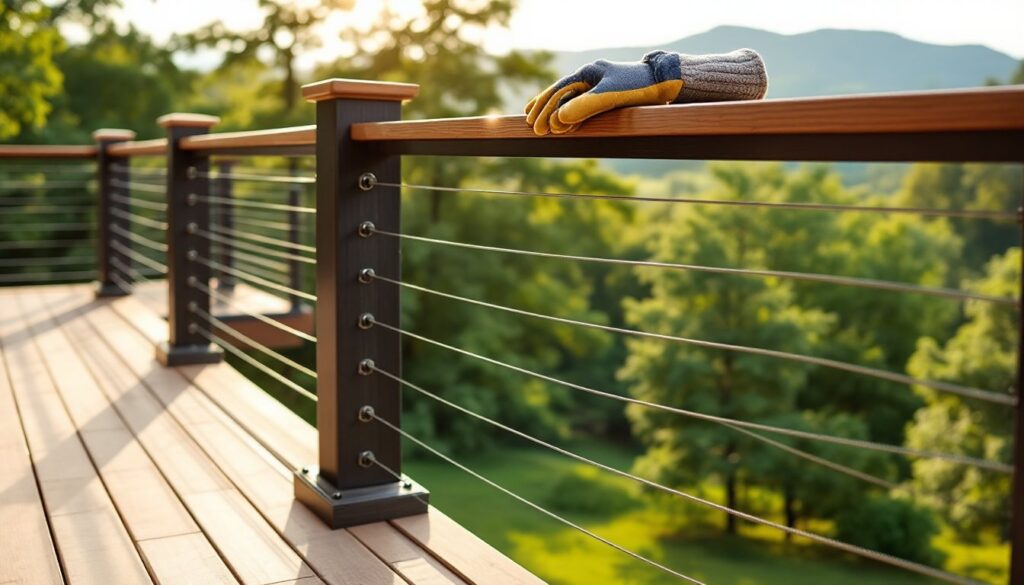
Cable railing consists of horizontal stainless steel cables (typically 3/16″ or 1/8″ diameter) spaced 3–4 inches apart vertically, running between sturdy posts. The cables are tensioned using threaded fittings or turnbuckles, creating a taut barrier that meets International Residential Code (IRC) requirements for deck guardrails, usually 36″ minimum height for decks below 30″ off the ground, and 42″ for higher elevations. Local codes vary, so always verify.
Homeowners choose cable railings for several practical reasons. First, they preserve views. If the deck overlooks a lake, mountains, or garden, traditional balusters chop up the sight line. Cable systems keep the focus where it belongs. Second, they’re low-maintenance. Stainless steel doesn’t rot, warp, or need annual staining like wood. A quick wipe-down with soapy water keeps them clean. Third, they pair well with almost any deck material, composite, pressure-treated lumber, cedar, or Ipe, and work with modern or rustic design styles.
That said, cable railing isn’t a fit for every project. The posts must be strong and properly braced, because cable tension exerts significant outward pull on the post tops. Typical wood posts (4×4 nominal, actual 3.5″ x 3.5″) may not be robust enough without reinforcement or closer spacing. Metal posts or beefier wood posts (6×6) are often better. Also, cable railing tends to cost more upfront than wood balusters, expect to spend $60–$120 per linear foot installed, depending on materials and hardware quality.
Types of Cable Railing Systems for Decks
Cable railing systems come in several configurations, each suited to different post materials and DIY skill levels.
Surface-mount kits fasten directly to the face or top of existing posts using brackets. These are the easiest for retrofit projects, no need to drill through posts. Hardware is visible but can be powder-coated to match. This is the go-to option if posts are already installed and you don’t want to modify them.
Through-post systems drill clean holes through posts, and cables pass straight through. Fittings sit on the opposite side, creating a sleeker look. This works best with metal or thick wood posts (6×6 or larger) that can handle drilling without compromising strength. Through-post installs require precise alignment, a drill guide or jig is essential.
Hybrid systems combine surface brackets on some posts with through-holes on others. This is useful on multi-level decks or when dealing with different post types.
Pre-assembled panels arrive with cables already tensioned in an aluminum or stainless frame. They slide into channels on posts or attach via brackets. Panels speed up installation dramatically but limit customization, panel widths are fixed, so post spacing must match.
Material choice also matters. Stainless steel cable (grade 316 marine-grade for coastal areas, 304 for inland) resists rust and handles tension well. Some systems use vinyl-coated cable for a black or bronze finish, which adds a contemporary look but may show wear over time. Aluminum or powder-coated steel posts are popular for a modern aesthetic and stand up to weather without painting. Wood posts work fine if they’re adequately sized and braced.
Planning Your Cable Railing Installation
Before ordering materials, measure carefully and check local building codes. Most jurisdictions follow IRC guidelines: guardrail height must be at least 36 inches (measured from the deck surface to the top of the rail), and spacing between cables can’t allow a 4-inch sphere to pass through. This typically means 3-inch vertical spacing between cables.
Post spacing is critical. For wood posts, 4-foot spacing is common, but cable tension may require posts every 3–4 feet depending on cable diameter and post strength. Metal posts can often span wider. Check the manufacturer’s specs, most systems list maximum recommended spacing. Closer posts mean more hardware but less deflection and sagging.
Decide on corner and end post reinforcement. Because cables pull outward, corner and end posts experience the most stress. Options include:
- Blocking or bracing between posts and the deck frame
- Through-bolting posts to the rim joist with lag bolts or structural screws
- Steel post bases anchored to footings or the deck substructure
Skipping this step leads to leaning posts and loose cables within a year.
Order 10–15% extra cable to account for cuts, threading through fittings, and mistakes. Cable is sold by the foot or in spools. Fittings, swage studs, lag terminals, turnbuckles, are typically sold in bulk packs sized for specific post spacing and run counts. One run equals one continuous cable from post to post.
Gather tools:
- Drill and bits (for through-post holes or mounting brackets)
- Cable cutters or an angle grinder with a cutoff wheel (standard wire cutters won’t cleanly cut stainless cable)
- Measuring tape and level
- Wrenches for tensioning fittings
- Drill guide or jig if drilling through posts
- Safety glasses and gloves (cut cable ends are sharp)
Permit requirements vary. In many areas, deck guardrails are part of the original deck permit and require inspection. If retrofitting railing on an older deck, check with the local building department.
Step-by-Step: Installing Cable Railing on Your Deck
This walkthrough assumes a through-post system on wood or composite posts. Surface-mount kits follow a similar logic but skip the drilling.
1. Mark and drill post holes
Measure from the deck surface and mark the vertical position for each cable run. Start 2–3 inches from the top rail and space remaining cables 3 inches apart vertically. Use a level and straightedge to transfer marks across all posts, misaligned holes create a wavy cable line.
Drill pilot holes slightly larger than the cable diameter (usually 1/4-inch bit for 3/16″ cable). A drill guide keeps holes perpendicular. Drill from both sides to avoid blowout on the exit side.
2. Install top and bottom rails
If your system includes a top rail (many do for a finished look and code compliance), fasten it to the post tops using structural screws or lag bolts. Bottom rails or base plates provide a mounting point for lower cable fittings and add rigidity.
3. Thread the cable
Starting at one end post, insert the cable through the first hole. Attach the lag terminal or swage stud fitting on one end according to the manufacturer’s instructions, some use a crimping tool, others thread onto the cable. Pull the cable through intermediate posts and across to the opposite end post.
4. Tension the cable
At the far end, attach a turnbuckle or adjustable fitting. Hand-tighten first, then use wrenches to increase tension. The goal is to eliminate sag but not over-tension, which can bow posts inward. A properly tensioned cable should deflect no more than 1/2 inch under moderate finger pressure. Some installers use a tension gauge for consistency, especially on longer runs.
Repeat for each cable run. Work from bottom to top or top to bottom, either works, but staying consistent makes alignment easier.
5. Cut and cap cable ends
Once tensioned, trim excess cable with cable cutters, leaving about 1/4 inch beyond the fitting. File sharp edges if needed. Many fittings include decorative caps to cover threaded ends and prevent snags.
6. Final adjustments and inspection
Recheck tension after a few days. Cables can stretch slightly under load. Walk the deck perimeter and apply light pressure to the railing, it shouldn’t flex more than allowed by code. If posts lean outward, add bracing or reduce cable spacing.
Safety note: Wear cut-resistant gloves when handling cable. Stainless steel strands can cause painful punctures if frayed.
For visual inspiration and alternative railing styles, including vertical cable configurations, many homeowners find it helpful to see finished examples before finalizing their design.
Maintenance Tips for Long-Lasting Cable Railings
Cable railings are marketed as low-maintenance, and they mostly live up to that, but they’re not zero-maintenance.
Cleaning: Wipe cables every few months with a soft cloth and soapy water to remove pollen, dirt, and salt spray (especially important in coastal areas). For stubborn grime, use a stainless steel cleaner or a paste of baking soda and water. Avoid abrasive pads, which can scratch the finish. Rinse thoroughly and dry to prevent water spots.
Tension checks: Once or twice a year, walk the railing and check for loose cables. Temperature swings and settling can cause cables to slacken. Tighten turnbuckles as needed. If a cable sags even though retensioning, inspect the fittings, corrosion or a failed crimp may require replacement.
Corrosion inspection: Stainless steel resists rust, but it’s not immune, especially grade 304 in marine environments. Look for tea staining (light surface rust) at fittings or where dissimilar metals touch. Treat early corrosion with a stainless steel polish or a mild acid cleaner (citric acid works well). For severe rust, replace the affected cable or fitting.
Post and hardware checks: Inspect post bases and mounting brackets annually. Loose bolts or cracked wood should be addressed immediately, structural failure in a guardrail is a serious safety hazard. Tighten fasteners and look for signs of rot or insect damage in wood posts.
Snow and ice: In snowy climates, avoid leaning shovels or snow blowers against cable railings. Ice buildup can stress cables and fittings. Gently knock off heavy snow accumulation.
With routine attention, a quality cable railing system can last 20+ years without major repairs. Compare that to wood balusters, which may need refinishing or replacement every 5–10 years.
Common Mistakes to Avoid When Installing Cable Railings
Cable railing isn’t complicated, but a few mistakes trip up first-timers.
Undersized or under-braced posts: This is the number-one failure point. A 4×4 post on 6-foot centers won’t handle cable tension without bowing. Use larger posts, closer spacing, or add diagonal bracing. Corner and end posts need extra reinforcement, blocking, through-bolting, or steel brackets. Don’t guess: follow the railing manufacturer’s specs or consult a structural engineer if in doubt.
Ignoring code spacing: Cables spaced 4 inches apart look clean but fail the 4-inch sphere test. Inspectors will red-tag it. Stick to 3-inch maximum spacing unless local code allows otherwise.
Poor hole alignment: Wavy cables are usually the result of misaligned post holes. Measure twice, drill once. A laser level or a straightedge clamped across posts makes layout easier. Drill slowly to avoid wandering bits.
Over-tensioning: More tension isn’t always better. Over-tightened cables can pull posts inward, crack wood, or snap fittings. Tension until the cable is taut with minimal sag, usually around 200–300 pounds of force per cable. If you don’t have a tension gauge, err on the side of slightly looser and retighten after settling.
Mixing incompatible materials: Galvanized steel fittings on stainless cable can cause galvanic corrosion in damp environments. Stick to stainless fittings with stainless cable, especially outdoors. For design ideas that blend materials thoughtfully, browsing platforms like Houzz can offer insight into how professionals pair cable systems with various post and decking materials.
Skipping end caps or finishing touches: Sharp cable ends and exposed threads are safety hazards. Cap fittings and file burrs. This also prevents rust from starting at cut ends.
DIY on high or complex decks without help: Installing cable railing on a second-story deck with multiple angles is a two-person job minimum. The tensioning process is easier with an extra pair of hands, and working at height alone is unsafe. For advanced layouts or structural concerns, resources like This Old House provide detailed tutorials and professional advice.
Conclusion
Cable railing delivers the modern aesthetic and open views many homeowners want, but it demands careful planning and solid installation. Posts must be properly sized and braced, holes aligned precisely, and cables tensioned correctly to meet code and last decades. The upfront cost and effort are higher than basic wood balusters, but the payoff is a durable, low-maintenance railing that won’t block the scenery. Stick to the fundamentals, measure carefully, reinforce corners, and don’t rush the tensioning, and the result will be a deck railing that’s both beautiful and built to last.